
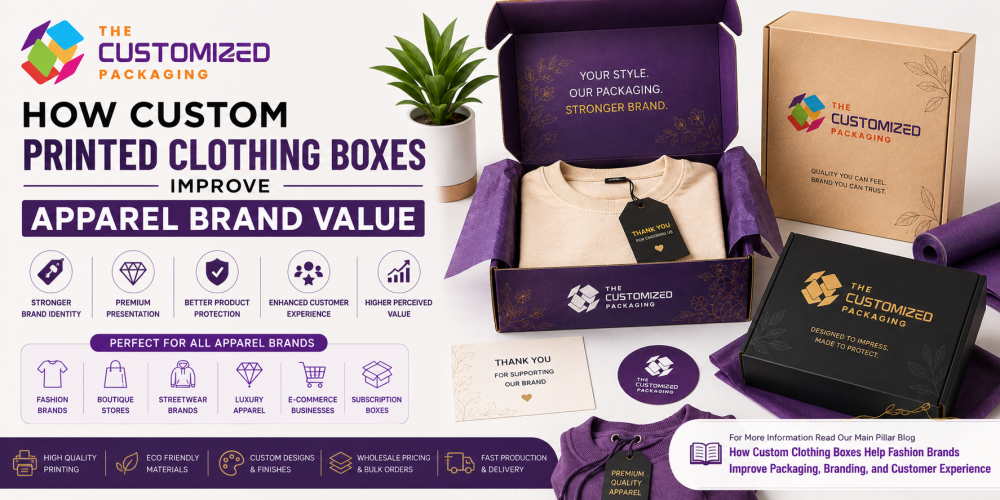
How Custom Printed Clothing Boxes Improve Apparel Brand Value
Custom printed clothing boxes help apparel brands improve brand value by making clothing products look more professional, premium, and memorable. With custom clothing boxes with logo, printed mailer boxes, rigid boxes, kraft boxes, luxury finishes, ecommerce packaging, retail-ready designs, and wholesale custom boxes, fashion brands can protect products, improve presentation, build recognition, and create a stronger customer experience.
 Published June 06, 2026
11 min read
Published June 06, 2026
11 min read
In the fashion industry, customers often judge a brand before they ever wear the product. They notice the product photos, packaging style, logo, colors, material quality, and unboxing experience. This is why custom printed clothing boxes are important for apparel brands that want to look more professional, more memorable, and more valuable in a competitive market.
A plain box can protect clothing, but it does not create a strong brand impression. A professionally designed custom printed clothing box can make shirts, dresses, hoodies, scarves, baby apparel, activewear, streetwear, boutique clothing, luxury apparel, and fashion accessories look more premium. It helps customers understand that your brand cares about quality, presentation, and customer experience.
For apparel brands, packaging is not only a delivery tool. It is a branding tool. It tells customers who you are, what your style is, and why your product is worth remembering. With the right printing, logo placement, colors, materials, and finishing options, custom clothing packaging boxes can improve apparel brand value and help fashion brands grow stronger in ecommerce and retail markets.
At The Customized Packaging, we help apparel and fashion brands create high-quality custom boxes, custom packaging boxes, custom printed boxes, custom boxes with logo, wholesale custom boxes, and bulk custom boxes that protect products and improve brand presentation.
Why Custom Printed Clothing Boxes Matter
Custom printed clothing boxes matter because fashion is highly visual. Customers do not only buy clothing for function. They buy it for style, confidence, identity, comfort, and emotional connection. Packaging should support that experience.
When a customer receives clothing in plain packaging, the product may feel ordinary. But when the same product arrives inside a branded and beautifully printed box, it feels more professional and premium. This can increase perceived value before the customer even touches the fabric.
Printed packaging also helps brands communicate important details. You can print your logo, tagline, product message, care instructions, QR code, website, social media handles, sustainability message, and brand story. These details turn packaging into a complete brand experience.
Custom Printed Boxes Build Apparel Brand Identity
Brand identity is one of the biggest benefits of custom printed boxes. Every fashion brand has a personality. Some brands are luxury. Some are bold. Some are minimal. Some are sustainable. Some are boutique-style. Your packaging should reflect that identity clearly.
A luxury apparel brand may use black boxes with gold foil printing. A streetwear brand may use bold graphics, strong typography, and inside printing. A boutique brand may use soft colors, floral patterns, and elegant fonts. A sustainable fashion brand may use kraft boxes with simple eco-friendly printing.
When your packaging matches your brand style, customers understand your identity faster. This makes your apparel brand look more consistent, polished, and trustworthy.
Custom Clothing Boxes with Logo Improve Recognition
Your logo is one of the most valuable parts of your packaging. Custom clothing boxes with logo help customers remember your brand and recognize it again.
A logo can be printed on the box lid, front panel, side panel, inside lid, tissue paper, sticker, ribbon, product tag, or thank-you card. For premium packaging, your logo can also be highlighted with embossing, debossing, spot UV, gold foiling, silver foiling, or rose gold foiling.
When customers receive apparel inside logo packaging, your brand becomes part of the unboxing experience. If customers share photos or videos online, your logo also gets more visibility. This helps improve brand recall and creates a stronger connection with buyers.
Custom Printed Clothing Boxes Increase Perceived Value
Perceived value is very important in fashion. Customers often connect packaging quality with product quality. If the packaging looks premium, customers may feel the clothing inside is also premium.
A simple shirt can look more valuable inside a printed clothing box. A scarf can feel more gift-worthy with branded packaging. A hoodie can feel more exclusive inside a bold custom mailer box. A dress can feel more luxurious inside a rigid printed box with tissue paper and inserts.
This is why custom printed clothing boxes are useful for brands that want to improve product value without changing the product itself. Better packaging can make apparel products feel more complete, more professional, and more desirable.
Custom Printed Boxes Improve Ecommerce Apparel Unboxing
For ecommerce apparel brands, packaging is the first physical experience customers have with the brand. Since customers cannot touch the product before buying, the delivery experience becomes very important.
Custom printed clothing boxes for ecommerce help online fashion brands create a better unboxing experience. A printed mailer box with your logo, inside message, tissue paper, thank-you card, care instructions, and QR code can make the order feel more thoughtful.
This type of packaging can encourage repeat purchases, better reviews, and social media sharing. Customers are more likely to remember a brand that makes the delivery feel premium and personal.
Custom Printed Boxes Improve Retail Apparel Presentation
Retail presentation also matters. In boutiques, clothing stores, fashion counters, pop-up shops, and gift sections, customers compare products quickly. Packaging can help your product stand out.
Custom printed clothing boxes for retail can show your logo, product name, size, material, barcode, care details, and QR code. This helps customers understand the product while making the packaging look professional.
Retail-ready printed boxes work well for shirts, scarves, ties, socks, baby apparel, lingerie, fashion accessories, and clothing gift sets. Better shelf presentation can help customers notice your products faster and feel more confident about buying them.
Custom Printed Mailer Boxes for Clothing Brands
Custom printed mailer boxes are a strong option for ecommerce clothing brands. They are durable, practical, and easy to customize. Mailer boxes work well for shirts, hoodies, scarves, activewear, streetwear, baby apparel, boutique clothing, and subscription apparel boxes.
They can be printed inside and outside with your logo, colors, patterns, slogans, and brand messages. Inside printing is especially powerful because it creates a surprise when customers open the box.
For online clothing brands, printed mailer boxes protect products while improving brand experience.
Custom Printed Rigid Clothing Boxes for Luxury Apparel
Luxury fashion brands need packaging that feels strong, elegant, and high-end. Custom printed rigid clothing boxes are ideal for premium apparel products such as designer shirts, dresses, scarves, ties, formalwear, lingerie, bridal clothing, and fashion gift sets.
Rigid boxes can be printed with minimal branding, luxury patterns, foil details, soft-touch coating, and inside messages. They can also include magnetic closures, drawer styles, ribbon pulls, and custom inserts.
Luxury printed boxes make clothing products feel more exclusive and support higher perceived value.
Custom Printed Kraft Clothing Boxes for Sustainable Brands
Sustainable apparel brands can use custom printed kraft clothing boxes to support eco-friendly values. Kraft packaging has a natural and responsible look, making it ideal for organic clothing, handmade apparel, baby clothing, linen products, ethical fashion, vegan fashion, and eco-conscious accessories.
Kraft boxes can be printed with your logo, recycling icons, sustainability messages, care instructions, and QR codes. Simple printing often works best because it keeps the design clean and natural.
For sustainable fashion brands, printed kraft boxes help connect packaging with brand values.
Custom Printed Gift Boxes for Apparel Products
Clothing is often bought as a gift, so packaging should feel presentable. Custom printed clothing gift boxes make apparel products feel more thoughtful and ready to give.
Gift boxes can include printed logos, patterns, tissue paper, ribbons, inserts, thank-you cards, and luxury finishes. They work well for birthdays, holidays, Eid, Christmas, Valentine’s Day, Mother’s Day, Father’s Day, weddings, corporate gifting, and seasonal fashion promotions.
Printed gift packaging helps make apparel products feel more special and memorable.
Wholesale Custom Printed Clothing Boxes for Growing Brands
As apparel brands grow, packaging costs become important. Ordering custom printed clothing boxes wholesale helps reduce the cost per box while keeping branding consistent.
Wholesale custom boxes are useful for ecommerce orders, retail packaging, boutique collections, subscription boxes, influencer PR kits, seasonal campaigns, and apparel gift packaging. When brands order bulk custom boxes, they can prepare for higher demand and maintain a consistent brand image.
Wholesale packaging also helps keep your logo, colors, box size, material, printing quality, and finishing the same across all orders.
Best Printing Options for Clothing Boxes
Popular printing options for custom printed clothing boxes include digital printing, offset printing, CMYK printing, PMS color printing, full-color printing, and one-color printing.
Digital printing works well for small runs and seasonal packaging. Offset printing is ideal for larger wholesale orders because it creates consistent quality. PMS printing helps match exact brand colors, which is important for fashion brands with a strong visual identity.
Sharp printing makes logos, patterns, product names, and brand messages look clean and professional.
Best Finishing Options for Custom Printed Clothing Boxes
Finishing options can make printed clothing boxes look more premium. Popular finishes include matte lamination, gloss coating, soft-touch coating, gold foiling, silver foiling, rose gold foiling, embossing, debossing, spot UV, inside printing, ribbon closures, magnetic closures, custom inserts, and die-cut windows.
Luxury brands may choose foil stamping and soft-touch coating. Boutique brands may use ribbons and pastel printing. Streetwear brands may choose bold graphics and spot UV. Sustainable brands may use kraft packaging with simple printing and debossing.
The right finish should match your apparel brand identity.
What to Print on Custom Clothing Boxes
A good printed clothing box should be attractive and useful. Important details can include brand logo, product name, size, material, care instructions, sustainability claim, barcode, QR code, website, social media handles, return information, and short brand message.
A QR code can link customers to styling guides, care instructions, product videos, loyalty programs, return instructions, or your ecommerce store.
For premium packaging, keep the front clean and use inserts, tags, or inside printing for extra details.
How Custom Printed Clothing Boxes Improve Apparel Brand Value
Custom printed clothing boxes improve apparel brand value by making products look more professional, protected, recognizable, and memorable. They help fashion brands create stronger first impressions, better ecommerce unboxing, improved retail presentation, and more consistent branding.
For ecommerce brands, printed packaging improves delivery experience. For retail brands, it improves shelf appeal. For boutique brands, it creates a personal and polished look. For luxury brands, it supports premium pricing. For sustainable brands, kraft printed packaging communicates responsible values.
Printed packaging is not just decoration. It is part of how customers judge, trust, and remember your fashion brand.
Why Choose The Customized Packaging for Custom Printed Clothing Boxes?
At The Customized Packaging, we help fashion and apparel brands create high-quality custom printed clothing boxes that improve apparel brand value. Whether you need packaging for shirts, dresses, hoodies, scarves, ties, baby apparel, activewear, boutique clothing, streetwear, luxury fashion, subscription boxes, or influencer PR kits, we can create boxes according to your brand needs.
We offer custom boxes, custom packaging boxes, custom printed boxes, custom boxes with logo, custom mailer boxes, rigid clothing boxes, kraft clothing boxes, custom clothing gift boxes, wholesale custom boxes, and bulk custom boxes for fashion brands of all sizes.
As a professional custom box manufacturer and custom packaging supplier, we provide custom sizes, premium materials, logo printing, kraft options, ribbons, inserts, die-cut windows, ecommerce packaging, retail-ready packaging, luxury finishes, and wholesale pricing.
Final Thoughts
Custom printed clothing boxes are one of the best ways to improve apparel brand value. They help fashion brands protect products, improve presentation, build recognition, and create better customer experiences.
Whether you need custom printed clothing boxes, clothing boxes with logo, custom mailer boxes, rigid clothing boxes, kraft clothing boxes, luxury apparel boxes, custom clothing gift boxes, wholesale custom boxes, or affordable custom packaging boxes, the right printed packaging can help your brand stand out.
For more detailed information, read the main pillar blog titled “How Custom Clothing Boxes Help Fashion Brands Improve Packaging, Branding, and Customer Experience.”