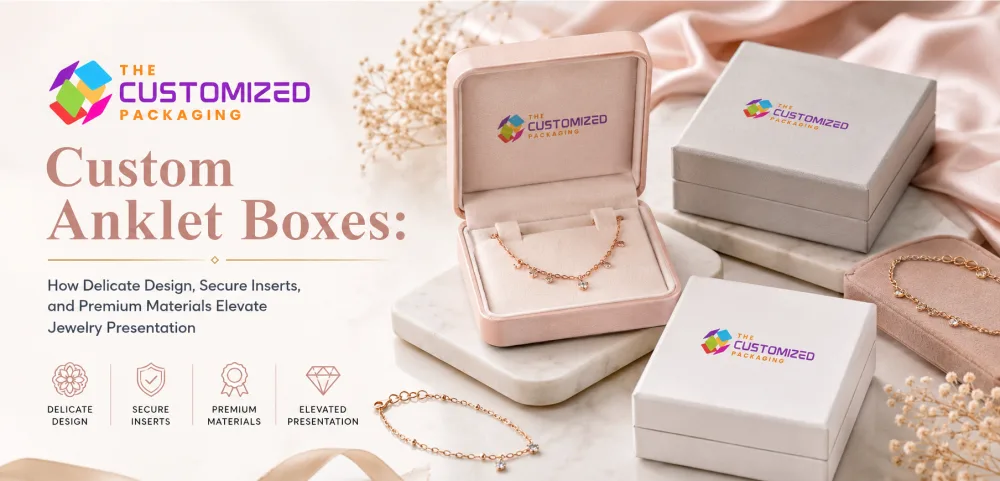
Custom Anklet Boxes: How to Get the Chain, Insert and Fit Right
Anklets need packaging that controls delicate chains without pulling, tangling or hiding decorative details. Learn how to size the box, position the clasp, choose the insert and test the finished packaging around the actual jewelry.
 Published June 29, 2026
Updated August 20, 2026
13 min read
The most important part of a custom anklet box is not the logo on the lid. It is what happens to the jewelry when the box is moved, opened and closed.
Anklets combine several small components that can behave differently inside packaging: a fine chain, clasp, extension, charms, beads, gemstones and decorative center sections. If those elements are not positioned carefully, the anklet can twist underneath the insert, slide into a corner or arrive with the feature customers are supposed to see hidden from view.
Good anklet packaging boxes should therefore be designed from the jewelry inward.
A practical sequence is:
Anklet design → Display position → Clasp control → Insert → Internal clearance → Box structure → Physical sample
Why Anklets Need Their Own Packaging Fit
An anklet should not automatically use the same interior created for a bracelet or necklace.
Anklets can include:
- Fine chains
- Longer adjustable sections
- Lobster clasps
- Spring-ring clasps
- Extension chains
- Dangling charms
- Beads
- Gemstones
- Pearls
- Multiple chains
The packaging has to control these elements without stretching the jewelry.
A box that is much larger than the displayed anklet can allow the chain to shift. A box that is too small can force the jewelry into a tight bend or press a charm against the lid.
The objective is not simply a snug box.
It is a controlled display position with enough clearance around the jewelry.
Start With the Finished Anklet
Measure the actual jewelry rather than designing from an estimated product size.
Record:
- Total chain length
- Wearable section
- Extension length
- Clasp dimensions
- Largest charm
- Highest stone or bead
- Decorative section width
- Approximate product weight
If several anklet designs will share one box, measure representative products from the range.
A delicate chain with one small charm may need very little depth. A layered anklet with stones and several dangling elements may need more clearance even when the outer chain length is similar.
Do Not Size the Box From the Full Chain Length
An anklet does not usually need to lie fully extended from one end of the box to the other.
The displayed shape can be:
- Gently curved
- Oval
- U-shaped
- Diagonal
- Partially wrapped
- Secured around several retention points
This makes it possible to create a compact presentation without forcing a long box around the full chain length.
For example, an anklet may measure several inches longer than the visible presentation area because the clasp and extension can be secured behind the insert.
The important measurement is therefore not only:
How long is the anklet?
It is also:
How will the anklet be arranged when the customer opens the box?
Decide What the Customer Should See First
The insert should position the most important part of the anklet toward the customer.
For a charm anklet, that may be the central charm.
For a gemstone design, it may be the decorated front section.
For a layered anklet, it may be the relationship between the two chains.
For a minimal chain, symmetry itself may be the main presentation feature.
Before designing the insert, place the actual anklet on a flat surface and arrange it in the position you want the customer to see.
Then identify:
- Visible chain section
- Hidden chain section
- Clasp location
- Extension location
- Charm position
- Required holding points
That becomes the starting layout for the anklet box insert.
Keep the Clasp and Extension Under Control
The clasp and extension often create more packaging problems than the main decorative section.
If they remain loose, they can:
- Slide underneath the visible chain
- Wrap around a charm
- Move into a corner
- Become trapped between the insert and box wall
- Scratch polished jewelry
A useful insert can hide or secure these parts behind the main presentation surface.
Possible methods include:
- Small slits
- Folded retaining tabs
- Hidden clasp pockets
- Rear channels
- Discreet loops
- Die-cut openings
The jewelry should remain secure without requiring the chain to be pulled tightly.
There should be no unnecessary tension on the clasp or fine connecting links.
Use Enough Holding Points to Control the Chain
One retention point may stop the anklet from falling out of the insert, but it may not control how the jewelry looks.
Several carefully positioned contact points can help maintain the intended shape.
For example:
Upper retention → controls one end
Lower retention → controls the opposite end
Hidden clasp area → controls excess chain
Center positioning → keeps the decorative section visible
The exact arrangement depends on the jewelry.
The goal is not to add as many slits or tabs as possible. Every retention feature should have a clear purpose.
Choose the Insert Around the Jewelry
Different anklet box inserts offer different levels of structure and presentation.
| Insert Type | Useful For | Main Consideration |
|---|---|---|
| Die-cut paperboard | Lightweight chains and retail ranges | Retaining cuts must match the jewelry |
| Foam | Products needing stronger positioning | Cutouts should not grip delicate parts too tightly |
| EVA | Precise structured support | Surface presentation may need a covering |
| Velvet-covered insert | Fine and premium jewelry | Retention points still need to control the chain |
| Satin-covered support | Gift and bridal presentation | Smooth fabric alone may not prevent movement |
| Suede-like board | Boutique jewelry presentation | Thickness and slit design affect holding strength |
A soft surface does not automatically create a secure insert.
For example, a satin pad may look elegant but still allow the chain to slide unless tabs, slots or another retention method are added.
Likewise, a firm foam insert can hold the jewelry securely but become difficult to use if the cut is too tight.
Avoid Putting Pressure on Charms and Stones
Raised details need vertical clearance.
Check the highest point of:
- Gemstones
- Beads
- Pearls
- Charms
- Decorative links
- Layered chains
Then confirm that the closed lid does not press on them.
The space inside the box includes more than the visible cavity.
You also need to consider:
Insert thickness + Product height + Lid clearance
A box can look deep enough from the outside while providing much less usable space after the insert is installed.
Test the complete package with the jewelry positioned exactly as it will be sold.
Make the Anklet Easy to Remove
Secure packaging should not turn into difficult packaging.
Customers should not have to pull a fine chain sharply through a narrow slot or use their fingernails to dig underneath the jewelry.
Check whether the customer can:
- Identify where to lift the anklet
- Release the clasp section easily
- Remove the chain without pulling
- Return the jewelry to the insert
- Close the box without trapping the chain
For fine jewelry, the customer experience should feel controlled and simple.
If a retention system protects the jewelry during shipping but creates a high risk of damage during removal, it needs to be adjusted.
Design for Different Anklet Types
Different jewelry constructions benefit from different internal layouts.
| Anklet Type | Packaging Priority |
|---|---|
| Fine chain | Prevent tangling and excessive movement |
| Charm anklet | Keep the main charm facing forward |
| Gemstone anklet | Protect raised stones from the lid |
| Beaded anklet | Provide room for product thickness |
| Layered anklet | Keep individual chains separated |
| Pearl anklet | Reduce contact with harder components |
| Adjustable anklet | Control the extension chain |
| Bridal anklet | Combine secure fit with gift presentation |
| Anklet set | Separate products or provide dedicated positions |
One standard insert may work across a closely related collection, but test the most different products before standardizing the design.
When One Box Needs to Fit Several Anklets
Using one box across several SKUs can simplify packaging inventory.
The outer structure may remain consistent while the insert handles variations between products.
Before committing to one universal box, test:
- Shortest anklet
- Longest anklet
- Largest charm
- Highest gemstone
- Thickest beaded design
- Longest extension
- Layered style where applicable
If the products differ mainly in chain length, the same insert may work with a hidden extension area.
If the decorative dimensions vary significantly, separate inserts may be more appropriate even when the outer box stays the same.
This can preserve packaging consistency without sacrificing product fit.
Select the Box Structure After the Insert Layout
Once the chain position and insert are established, you can choose an outer structure that supports the intended presentation.
Common options include:
Two-Piece Boxes
A separate lid and base create a traditional jewelry presentation and leave a broad surface for branding.
Drawer Boxes
The jewelry is revealed as an inner tray slides from a sleeve. The insert should remain securely positioned during the movement.
Hinged Boxes
A connected lid can make the package easy to present at jewelry counters or during gifting.
Magnetic Rigid Boxes
These can suit higher-value collections where a substantial structure and controlled opening are appropriate.
Folding Cartons
Lightweight anklets and higher-volume retail ranges may use folding paperboard boxes with fitted card or lightweight inserts.
The structure should follow the product positioning rather than forcing every anklet into the most expensive box option.
Keep the Box Proportional to the Jewelry
Anklets are visually delicate.
A very large box can create too much empty space around the product, while an extremely compact box can make the jewelry feel crowded.
Look at the filled package from the customer's viewpoint.
Ask:
- Does the jewelry appear centered?
- Is the decorative area easy to see?
- Is there enough breathing room around it?
- Does the box feel unnecessarily large?
- Does the product look compressed?
- Does the packaging suit the value of the jewelry?
Good proportions allow the jewelry to remain the focal point.
Use Branding Without Competing With the Product
The outside of the box can carry the main branding while the inside remains visually controlled.
Useful elements can include:
- Logo
- Collection name
- Brand color
- Short interior message
- Care information
- Website
- QR code
For premium packaging, a single foil or embossed logo may be enough.
For fashion jewelry, printed artwork can provide more color and collection differentiation.
Keep interior branding away from the main jewelry display area when it competes visually with the anklet.
The customer should notice the product before discovering every printed detail.
Consider Windows Only When Visibility Helps
A window can make sense when customers need to see the anklet without opening the box.
This may be useful for:
- Boutique retail
- Fashion jewelry
- Product variants
- Gift displays
- Multi-style collections
The insert becomes especially important because the jewelry needs to remain aligned beneath the opening.
If the chain rotates or the charm moves away from the intended position, the window can make poor product alignment more noticeable.
For products where visibility is a major selling requirement, a two-piece window box can combine a clear viewing area with a fitted interior.
Protect the Jewelry During Ecommerce Shipping
The jewelry presentation box and the shipping package perform different jobs.
A delicate folding or rigid anklet box may still need suitable outer protection when shipped to a customer.
A typical ecommerce system might be:
Anklet → Fitted insert → Branded jewelry box → Protective mailer or shipping carton
The outer package should control movement and protect the presentation box from crushing or surface damage.
Inside the jewelry box, the chain should remain attached to its intended retention points after normal handling.
Do not judge ecommerce performance from the empty box.
Test the complete filled package.
Sample the Anklet Inside the Finished Box
A digital proof can confirm artwork and basic dimensions.
It cannot show whether:
- The clasp stays hidden
- The chain remains centered
- A charm rotates
- The insert grips too tightly
- A gemstone touches the lid
- The customer can remove the anklet easily
- The jewelry shifts during transportation
A physical sample should be tested with the actual anklet or a representative piece.
Open and close the box several times.
Move it through normal packing and handling.
Then open it again and check whether the jewelry still appears as intended.
That is the real test of a successful anklet packaging design.
What to Provide When Requesting Custom Anklet Boxes
For an accurate recommendation or quotation, provide:
- Anklet type
- Total chain length
- Extension length
- Clasp dimensions
- Largest charm or stone
- Highest product feature
- Preferred display position
- Number of anklets per box
- Preferred structure if known
- Insert preference
- Printing requirements
- Quantity
- Retail, gifting or ecommerce use
- Delivery destination
Photos of the jewelry laid out in the desired presentation position are particularly useful.
If several anklets will share one package, provide examples from across the collection.
Custom Anklet Packaging From The Customized Packaging
The Customized Packaging develops custom anklet boxes around the jewelry itself, including the chain layout, clasp, extension, charms, insert and desired presentation.
Available structures can include two-piece boxes, drawer packaging, hinged boxes, rigid magnetic boxes, folding cartons and window packaging.
Custom inserts can also be developed to keep the anklet positioned without creating unnecessary pressure on delicate links or decorative components.
For the most accurate design, start with the finished jewelry and the position in which you want the customer to see it.
Once the product layout is established, the box dimensions, insert and structure can be developed around that presentation.
Frequently Asked Questions
What size box should I use for an anklet?
The box should be sized around the anklet's intended display position rather than its fully extended chain length alone. The clasp, extension, charms, insert thickness and required lid clearance should all be considered.
How do you stop an anklet from tangling inside a box?
A fitted insert can use slits, tabs, channels or hidden clasp areas to control the chain and extension. The objective is to limit movement without placing excessive tension on the jewelry.
What insert is best for custom anklet boxes?
The best insert depends on the anklet and presentation. Die-cut paperboard can work for lightweight retail products, while foam, EVA, velvet-covered, satin-covered or suede-like inserts may suit other jewelry constructions.
Should the anklet clasp be visible?
It does not have to be. Many presentations secure the clasp and extension behind or beneath the insert so the decorative section remains the visual focus.
Can one anklet box fit several styles?
Yes, when the products have compatible dimensions and display requirements. Test the smallest, largest, longest and highest-profile anklets before standardizing one box and insert.
Are rigid boxes necessary for anklet packaging?
No. Rigid structures can suit premium or gift collections, but lightweight folding cartons and paperboard boxes may be appropriate for other anklets. Product fit and insert performance are more important than choosing the heaviest structure.
Do anklet boxes need inserts?
Most delicate chains benefit from some form of controlled positioning. The insert may be very simple, such as a die-cut card with retention slits, or more substantial for premium jewelry.
Should I order an anklet box sample before production?
Yes, especially when the insert, dimensions or jewelry layout are new. A physical sample lets you test chain position, clasp control, product removal, lid clearance and overall presentation.